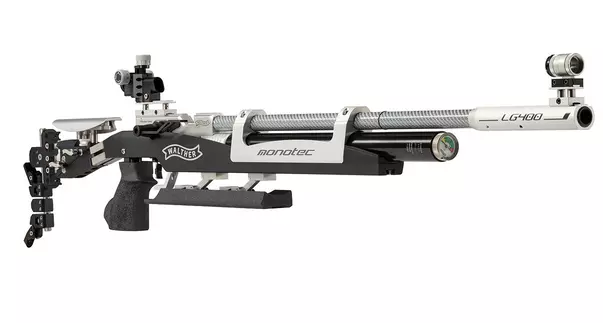
Air Rifle – Adjusting and setting up your rifle
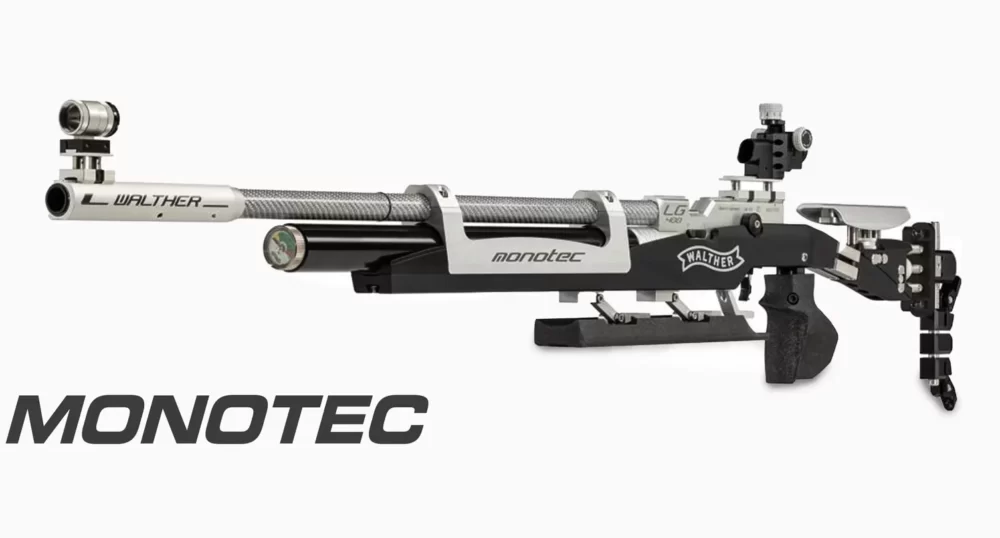


Air Rifle – Adjusting and setting up your rifle
Adjusting the length of the rifle stock
Adjusting the length of the rifle stock (including butt-plate) is very important. If it is not
adjusted correctly then many mistakes can occur and accuracy can suffer.
This can quickly cause confusion unless the shooter understands the
consequences when the shots that seem to be ‘good’ may appear on the
target as ‘bad’ shots and vice versa.
The correct length of the rifle stock is very individual and depends on many
parameters. Length is influenced by the shooter’s shoulders and chest size,
by their overall left arm length (for right-handed shooters) including the length
of the upper arm (from shoulder to elbow) and the lower arm (from elbow to
left hand extended flat as if holding the rifle fore-end).
Other factors also impact it including neck length, hand size, the fit of the
rifle jacket, the height of the rifle butt-plate, the position of the ‘V’ of the pistol grip,
and distance between the axis of the rifle-barrel (bore-line) and sightline
(number and height of spacers).
Achieving the right length of the rifle stock is quite difficult. I suggest you
should take some time (do not hurry). It requires patience and ‘trial and
error’. After some time the optimum length can change and you may have to
revise it by about 0.5 to 2 mm.
Here are some simple directions to help adjust the length of the rifle stock
(and butt-plate).
Hold the pistol grip of the rifle with the right hand (left-handers reverse) and
lift the rifle so that the butt-plate rests on the upper arm immediately above
the elbow. The length of the stock should be adjusted so that the pressure on
the ‘V’ of the thumb, the index finger is comfortable and not too tight.
The same applies to the tension between your shoulder and the butt plate – it should not
be too ‘tight’, just ‘positive’. After adjustment, the upper arm and lower arm should form an isosceles (equal-sided) triangle with the rifle in the shooting
position. I want to emphasize that the adjusted length of the rifle stock/butt-plate is really only approximate and needs to be individually fine-tuned over
time.
It helps to have a coach available to assist when making these
adjustments.
Adjusting stock/butt-plate, its angle, and height
The stock/butt-plate transfers recoil of a shot from the rifle to the body. Its
adjustment has a large influence on the reaction of the rifle after a shot is
fired. If the adjustment of the butt-plate is correct, the transfer reaction of a
shot into the body is always with the same intensity and into the same place.
It helps to minimize group size and reduce ’fliers’ (shots away from the main
group).
Adjusting the butt-plate is possible both horizontally and vertically. The butt-plate should be as close as possible to the axis of the rifle in the horizontal
(sideways) direction. This needs to take into account chest size, arm length
thickness, and neck length. The adjustments to the height of the butt-plate
and horizontal adjustment from the axis of the rifle barrel can then be
completed. You need to understand that moving the butt-plate away from the
axis of the rifle causes inconsistent recoil and follow-through and produces
more ‘fliers’. According to ISSF Rules, the butt-plate can be moved up to
30mm from the barrel axis on either side and must not be parallel with the
vertical axis of the rifle stock.
The angle of the butt-plate must be such that the point of contact between the
butt-plate and the shoulder /arm is stable and consistent from shot to shot
during aiming and firing/follow-through.
The height of the butt-plate is determined by the zero point (natural point of aim) of
the position. If the zero point is high above the target, you have to move the
butt plate down. If the zero point is under the target, you should not try and hold the rifle on the target by force; instead, you need to move the butt-plate up.
Adjusting the palm rest of the rifle.
According to ISSF Rules, the palm rest can be moved up to
120mm below the barrel axis. You need to adjust it so, that the zero point of your position is exactly in the middle of the target. Palm rest should be supported by palm exactly the same way by every shot, otherwise will your group of shots always move somewhere out of ten.
Adjusting the cheek-piece of the rifle
The cheekpiece of the rifle helps to keep your head in the same place to
make aiming as comfortable as possible with minimal tension on the neck
muscles. It’s important to have your head in precisely the same place looking
naturally through the diopter to the foresight (the sight picture) throughout the
shot process. Your cheek must retain a consistent point of contact and
pressure on the cheekpiece from shot to shot and it must not slip on the
cheekpiece. Pressure on the cheekpiece should be optimal ( not too big ) and
should be as close to the axis of the rifle as possible to avoid disturbing the
position of the rifle during the shot and recoil, follow-through.
Everyone has different shaped cheeks. The angle and rotation of the cheekpiece should respect these differences and at the same time should take
account of the above-mentioned advice.
I suggest keeping the cheek-piece parallel to the center-line (horizontal
position) and parallel with the axis of the rifle, or with only a minimal offset.
Don’t forget about the ISSF Rule when adjusting the cheek-piece which says
that the maximum distance of the cheekpiece should not be greater than
40 mm from the axis of the rifle.
Adjusting hand-grip (“Pistol grip”)
The hand-grip of most modern rifles can be adjusted in every direction. This
can be a good thing, but it must be adjusted correctly, otherwise, it can
negatively affect accuracy. According to ISSF Rules, the hand-grip cannot
touch your shooting jacket (on the left side (right-handers) on the chest). It is
usually a problem with shooters having a pronounced arched back position
from the waist up which needs to be watched by the coach. At some
small competitions, range officers do not control it, and so many shooters achieve good results by breaking this Rule. At major competitions, this Rule is
more strictly controlled and so these shooters (who are breaking rules) often
have problems that affect their results.
What do you do if your pistol grip is touching your shooting jacket?
Many shooters file down the contact point of the hand-grip. Others often have
to alter their jacket on the left side of the chest (right-handers), or both.
Moving the hand-grip to the maximum limit on the right side isn’t the optimal
solution because the rifle is then more affected by the weight of the right hand
and this can cause quite big errors.
The axis of the hand-grip (from back to front) should be as close as possible
under the axis of the rifle-barrel and can be rotated in the vertical axis slightly
to the left side (10 -11 o’clock) from the direction of the shooting. While moving
the rifle-grip to the side you should be aware that the maximum width of the
fore-end of the rifle is 60mm.
Adjusting the position of the trigger
The position of the trigger is very important. It has a direct influence on the technique of
shooting and group of shots. If isn’t trigger adjusted in a correct position this
brings problems with triggering. Every shooter has an individual adjusted correct
position. Very good is when the coach helps by adjusting of trigger because he
can see if is the position of the finger in the optimal position. You have to look if the angle of
the index finger has about 110 degrees. This angle should be in the moment, when
is the gun release shot. You need also to look at the place of contact between
finger and trigger. This place should be approximately in the center of the last part
index finger. It can be also moved approximately 1-3 mm from the center in
the direction to the top of this finger. These are places, where is the sensibility of feelings
higher and the negative influence on triggering minimal. You have to test different
contact positions to find the optimum for you. Adjusting the fore-end of the rifle
Some rifles offer you the possibility to adjust the fore-end. It’s good to take
advantage of this if you need to. The most important factor is to keep your left
hand in the shooting position touching the fore-end always at the same place
and with the same pressure so that the weight of the contact is constant and
equal across the full bearing surface, including the edges of the hand, with
minimum discomfort.
You can slightly turn the fore-end to the left or to the right side, as needed.
You need to understand that these movements change the centerline of the
rifle, and this has an impact on the rifle when firing a shot. If the fore-end is
moved incorrectly, then the results will be poor. In most cases, it is probably better
not to adjust the fore-end because while the rifle may not be adjusted
perfectly, it avoids many unwanted mistakes.
The principal aim is to achieve a set-up that brings the rifle (within the ISSF
Rules) as close to the perfect hold (‘natural point of aim’) and center-line of
the position as possible.
Adjusting any barrel extension
When you are adjusting any barrel extension you need to be careful, because
the length of the rifle (action + barrel, excluding the stock) is limited by ISSF
Rules to 850mm. If there is a rifles tube on the barrel with integral front sight,
the most convenient way is to adjust the barrel extension horizontally, so that
the sightline is above the axis of the barrel and not on the side.
Adjusting the diopter, iris, and blinder
The iris aperture on the diopter should be opened up to a maximum of
1.2mm.
If it is opened more, the visual acuity of aiming would be too low, and if it is opened
less, there will not be enough light getting through to your eye, the target
appears poorly illuminated, and aiming would not be precise. Your eye blinder should be adjusted horizontally so that the left eye cannot
see the target and to cut out any distracting contrast while aiming.
The blinder can be colored, but you need to choose a color that will
maintain the optimum visual acuity of the aiming eye. I suggest the following
colors: grey, black, dark green or dark blue. Many shooters use a paper
target or light green color blinder, but at the same time, they are using a cap,
which stops the light shining on the blinder so the color appears ‘darker’ in
the shooting position and perfect aiming contrast is maintained.
Adjusting the position of the diopter
The diopter needs to be placed so that your head, cap, and glasses aren’t
touching the iris and body of the diopter (it’s against ISSF Rules) and at the
same time the diopter needs to be as close as possible to the eye of the
shooter (30-40mm).
You should mark the correct position on the sight
mounting rail through experimentation.
Adjusting the position of the front sight and selection of
the optimum size of an aiming ring in the foresight
Select the size of the ring in the tunnel and fix it at the correct place (pre-
marked) on the rifle sight rail. The length and diameter of the tunnel of the front
sight are limited by the ISSF Rules (50mm and 25mm). The size of the ring should
be somewhere between 3.6 to 4.3mm. Advanced shooters often use sizes
between 3.7 to 3.8mm. To use these smaller sizes, you need to have the perfect
stability of the rifle and body. These smaller sizes improve aiming accuracy
provided good stability has been achieved. A lot depends on the quality of
your eyesight (visual acuity) and the frequency of training.
Beginners and lower-level shooters are commonly using ring sizes between 4.2 to 4.5 mm.
Smaller diameter ring sizes (below 3.6mm) are rarely used mainly because of
weak stability, weak eye acuity, and poor contrast while aiming. It is possible
to tell the level of a shooter, his general ability, and often his mental capacity according to the size of the ring he uses. The size of the ring depends also on
the length of the rifle (sight radius). Some young beginners with small and shorter
air rifles may use a smaller diameter ring, around 3.6 mm, but visually the
sight picture is equivalent to a ring size of 4.5 mm in a full-size rifle. Using a
rifle with a maximum system length of 850mm, I suggest for advanced
shooters a ring size of 3.8mm depending on the visual acuity of the shooter.
It’s good to test which sizes are best in different light conditions in the
following ways:
Test A:
Move the tunnel with a ring (around 3.8 mm, but can be smaller) along
the fore-sight mounting as close as possible to the diopter. After a few shots
move the tunnel back about 1cm back towards the muzzle (end of the barrel)
without changing the ring size and continue to fire a few shots. Watch how
the dispersal of shots (group) changes. If the group gets bigger, or you see
big aiming mistakes, enlarge the ring size about one-tenth (1/10) of a
millimeter. Continue this process until the tunnel is at the end of the barrel. Be
careful not to go beyond the end of the barrel because this is not allowed
under ISSF Rules. Continue the experiment until you achieve an optimum
sight picture and contrast.
Test B:
Fix the tunnel at the end of the barrel and continually change the size
of the ring. Begin with your usual (current) ring and after a few shots change it
for one about 0.1mm (smaller). Patiently and slowly change to smaller and
smaller rings, until you lose a good sight picture and you start to make big
aiming mistakes.
You are advised to undertake these tests from time to time. The size of the
ring is naturally developed to achieve an optimum sight picture. The most
important criterion is the size of the group and it is not about feeling comfortable
whilst aiming. This is because, in the beginning, the group is often better than your aiming ability. After some time you get used to the smaller ring size
but finding the optimum size can take some time.
It is advisable that the tunnel is fixed as close as possible at the end of the
barrel (muzzle) because a longer sight radius improves accuracy. At the
same time, try to find the optimal distance of the tunnel from the diopter. Be
aware that at the longest sight radius shooters’ eyes’ are sometimes losing
their ability to see the ring as clearly as they should, and this can lead to
mistakes. When conducting Tests ‘A’ and ‘B’ it is also important to assess the
visual sharpness of the ring while aiming. Visual sharpness of the foresight
ring picture is critically important for correct aiming. The distance at which the
eye is losing the sharpness of the ring is individual and changes depending on
light conditions and age. Other factors such as tiredness and the physical and
mental condition of the shooter are also relevant.
Weight of the Rifle
The maximum weight of the rifle is limited to 5.5 Kg.
Most rifle-makers are making rifles that weigh less than 5kg in the basic
configuration. My shooters have achieved great results with the rifle adjusted
to just under the maximum weight but also with rifles weighing considerably
less than 5kg. The question about whether to add additional weights to the
rifle is a personal decision for every shooter but I would say almost always,
yes! It is advisable as a general rule. Usually strong and tall shooters should
do so, in order to better compensate for their physical strength. A heavier rifle is
less affected by micro-vibrations/movements picked up from the shooter’s
body or other external factors including recoil than a lighter rifle.
You should make sure that you have the whole process of the shot including recoil and
position under control. If you are adding weight to the rifle, then it is advised
that the Centre of gravity of the gun ( CG ) should be approximately 1-3 cm in
front of where your left hand supports the rifle. This helps to improve the
stability of the rifle although this distance can be varied outside the above limits if necessary.
Weights should be added as close as possible to the axis of the barrel to
avoid moving the center of the rifle sideways.
It is permitted and convenient to put weights directly onto the barrel. It is
allowed to put additional weights onto the fore-end, but attention on the maximum
thickness of the fore-end. You can place additional weight inside the fore-end, but
in an air rifle usually, there is generally not enough space for it. At the rear of the
rifle, you can place weight under the cheek-piece and between the butt-plate
and stock. Balancing the weights in this way usually achieves a better result
and improves the stability and accuracy of the rifle.
General Note:
Make a note of all the adjustments and alterations in adjustments that you
make to your rifle from time to time along with any special results achieved in
a diary kept on a date-wise basis, and keep reviewing them. Before starting
your practice make sure that on each occasion the rifle is set on the latest
settings as noted in your diary. This diary carries the history of all your
practices, all the rifle settings, and the results achieved at different times, and
is a vital tool for all aspirant shooters.